


Your clay soil is a locked vault, heavy with potential yet stubbornly sealed against roots and water. You’ll spend seasons not fighting this ground but coaxing it open: 6–12 inches of compost worked through the profile, annual top-dressings of aged manure, and mulch against the crusting that punishes untended beds. Skip the sand; it turns your plot to concrete. Start with a percolation test, know your pH, and choose your path: amend in place or build raised beds above the clay. What you plant matters, too, for some cultivars thrive where others suffocate.
Understand Why Clay Soil Drains Poorly and Compacts
Why does your garden stay soggy days after a rainstorm while your neighbor’s plot drains perfectly? You’re likely dealing with clay soil, whose tiny plate-like particles pack tightly together, creating minimal pore spaces that severely restrict drainage and air movement. This dense structure prevents rainfall from penetrating deeply, leaving your garden waterlogged while surrounding areas dry.
When you work clay soil while it’s wet, you worsen compaction, destroying what little structure exists and making future tillage increasingly difficult. The resulting hardpan limits root penetration and oxygen availability, creating shallow root systems that struggle even when nutrients abound.
Understanding this behavior matters because you can’t fix what you don’t comprehend. Your clay soil’s drainage problems stem from physical properties, not gardening failures, and recognizing this distinction empowers you to choose effective amendments rather than wasting effort on futile digging.
Recommended Products

Feed the soil not the plants - stimulate microbial activity in your soil and boost probability of success with all types of plants… like composting but faster

Enhances Soil Structure: Loosens heavy clay soils, improving aeration, drainage, and root penetration.

Feed the soil not the plants - stimulate microbial activity in your soil and boost probability of success with all types of plants… like composting but faster
Test Your Clay Soil’s Drainage and Nutrients First
Where exactly do you stand with your clay soil before carting in amendments by the truckload? You need a soil test, because guessing wastes money and delays results. Order a comprehensive soil test through your county extension office, requesting analysis of drainage, nutrients, and pH. Dig a hole twelve inches deep, fill it with water, and observe how quickly it drains; if water lingers beyond four hours, you face significant drainage obstacles that threaten tuber crops like dahlias.
Your test results reveal specific nutrient deficiencies and pH imbalances, indicating whether you need sulfur for alkalinity correction or other targeted amendments. Even heavy clay soils surprise gardeners with extreme deficiencies. Understanding these limitations helps you set realistic timelines, typically two to three growing seasons, for measurable improvement in your garden’s performance.
Recommended Products
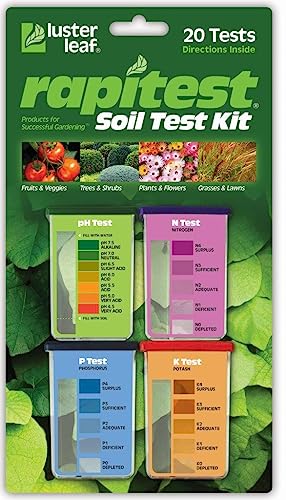
Quick, at home results for Soil pH, Nitrogen, Phosphorous and Potash Innovative and inexpensive soil test kit features an easy-to-use capsule system and patented color comparators

KNOW BEFORE YOU GROW | Grow the healthiest, sustainable lawn and garden with the most accurate and easy to use professional soil test kit on the market

Accurate Soil pH Testing: Dewildetradingco Soil pH Test Strips offer measurements of soil pH levels (pH 3.5-9). As an essential tool for every gardener and grower, these test strips help determine the optimal pH for various plants, such as outdoor plants, indoor plants, gardens, grass lawns, fruit trees, flowers, vegetables, and forest shrubs.
Choose: Amend In-Place or Build Above Clay Soil
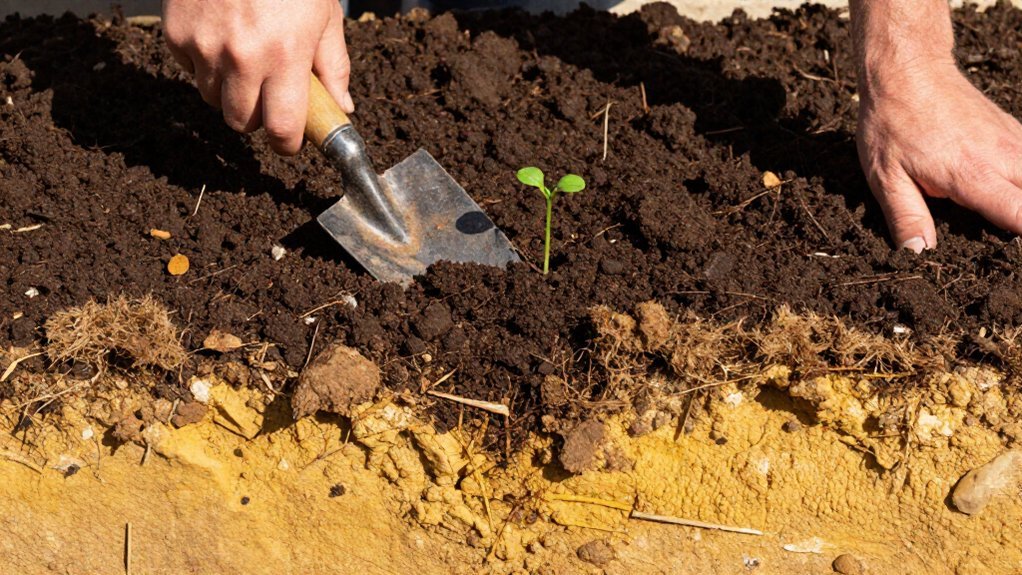
You’ve got three distinct paths forward when facing stubborn clay soil, and your choice will shape every season that follows. You can amend in-place, working organic matter like compost, aged leaf mold, or well-rotted manure directly into the native clay to gradually transform its structure and drainage, or you can build above it, constructing raised beds filled with quality topsoil and compost to bypass the problem entirely. Many experienced gardeners, particularly those in USDA zones 6 through 8 where clay dominates, eventually settle on a hybrid combination strategy, amending small sections intensively while establishing raised beds for immediate planting, a method that lets you expand your workable ground systematically over three to five growing seasons without overwhelming your schedule or budget.
Recommended Products

Kindly NOTE: This soil tester can not be applied to test pH value of any other liquid. If the soil is too dry the indicator will not move, and water it before testing.

How to Accurately Test Garden's Soil pH? Many growers do not able to use the correct tools and methods to obtain accurate soil ph values; NewTest soil ph test kit includes upgraded soil ph test strips, measuring cylinders, and instructions for professional testing methods; it allows even beginners to easily and accurately obtain soil ph values

【4 in 1 function】This is a 4-in-1 multifunctional soil tester.Our soil tester fastly to measure soil moisture, pH, temperature and sunlight to help you take better care of flowers and plants.You can know when you need to water your soil by measuring moisture and pH & Temperature value of the soil and sunlight level of plants with it.
Amend In-Place Method
How do you transform stubborn clay into workable garden soil without hauling it all away? You amend in-place by adding organic matter directly to your existing clay soil, loosening its structure and improving drainage without removing the problematic layer.
You’ll incorporate bulky amendments like composted bark, straw, or aged manure to create pore spaces and reduce compaction over time. Avoid sand entirely, as it fills gaps between clay particles and worsens drainage; instead, rely on organic matter and gradual mineral amendments when necessary.
For optimal results, work in small amounts across multiple seasons, thoroughly mixing amendments into the top 6–12 inches where roots grow. Finish by mulching the surface to conserve moisture, suppress weeds, and feed soil biota, steadily building tilth and drainage year after year.
Build Above Approach
Another path bypasses the battle with clay altogether: you build above it, constructing raised beds that lift your root zone clear of the compacted layer beneath.
You create raised beds to improve drainage, and you reduce compaction since you’re not trampling the growing area. You fill your structures with a blend of amended soil and organic matter, incorporating compost, aged manure, or shredded bark for sustained nutrient release.
You maintain structure through no-dig practices, preserving aggregation and fostering biological activity. You mulch the surface to regulate moisture and temperature swings. You apply calcium-rich amendments like lime or gypsum when your clay soil tests indicate pH or structural deficits. You replenish organic matter consistently, knowing that gradual, repeated additions build tilth over seasons without disrupting established ecology.
Hybrid Combination Strategy
Whether you’re facing a small backyard plot or a sprawling vegetable garden, you’ll eventually confront a fundamental decision about how to tackle your clay soil, and this choice shapes every subsequent season of your growing efforts.
The Hybrid Combination Strategy lets you choose between two proven paths: you can amend in-place by digging generous organic matter, compost, and gypsum into your native clay to gradually rebuild structure and porosity through layered applications over several seasons, or you can install raised beds to bypass the compaction entirely, filling them with well-draining soil mixes that deliver immediate root access and eliminate standing water issues.
Your decision hinges on available labor, timeline, and gardening goals. If you restore soil in situ, you’ll invest years for lasting transformation; if you build raised beds, you’ll gain faster production with compartmentalized drainage.
Why Sand Worsens Clay Soil (and What to Add Instead)
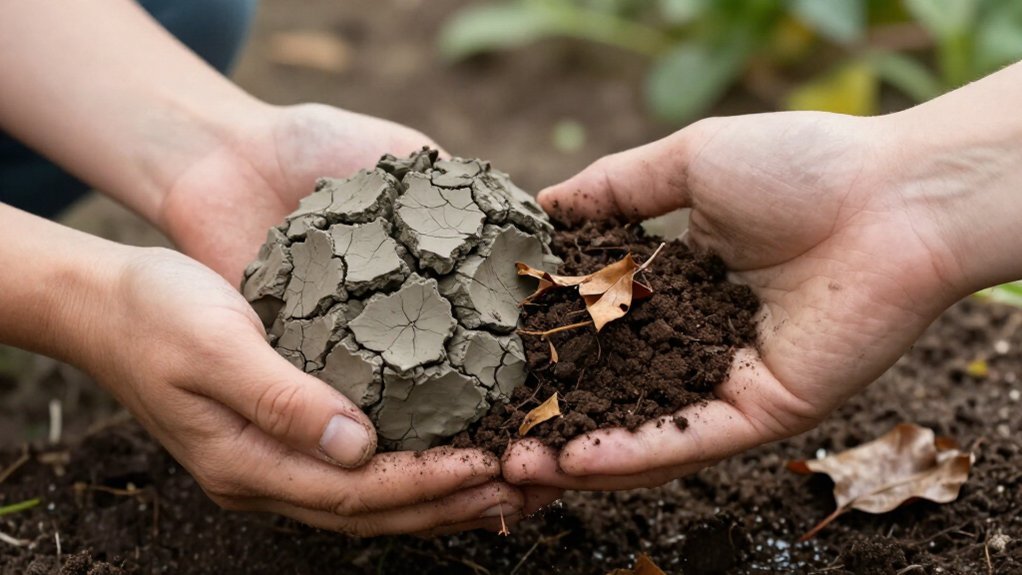
Why does adding sand to clay soil backfire so dramatically? You might think you’re creating better drainage, but you’re actually making things worse. When you add sand to clay, those coarse particles fill the spaces between fine clay particles, creating a dense, concrete-like mixture that blocks water movement rather than improving it.
To fix your soil properly, you need to focus on organic matter and smart amendments instead:
- Mix in compost or leaf mold, which loosens structure and builds lasting porosity.
- Choose coarse organic amendments that feed soil biology and improve aggregation.
- Try decomposed granite or pea gravel for lightweight drainage without compaction risk.
- Maintain steady mulch cover to regulate moisture and prevent surface sealing.
These approaches transform your clay soil gradually, giving roots the breathing room they need.
Recommended Products
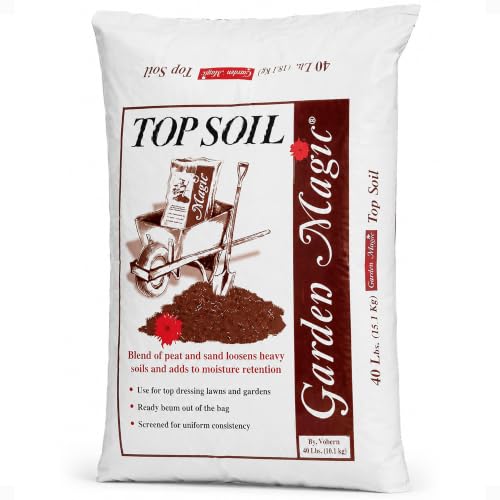
Ready-to-Use for All Planting Needs: This general-purpose potting soil is ready to use out of the bag, perfect for both indoor and outdoor planting without any extra prep

100% Organic & Peat-Free: Our compost mix is 100% organic & peat-free. Peat is one of Mother Nature’s most important stores of carbon. Instead of imported peat, the base of our soils is made from upcycled plant matter or wood fines from the United States!

Loosen Clay Soil With Compost and Organic Matter
How exactly do you transform heavy, compacted clay into the crumbly, fertile soil your plants crave? You’ll start by digging compost and other organic matter directly into your planting beds. This practice breaks up compacted layers, creates pore spaces for air and water movement, and will improve drainage dramatically over time.
You don’t need to tackle your entire garden at once. Work in stages, enriching small sections each season. Dig in bulky materials like composted bark, aged manure, or leaf mold to 12-inch depth. You’ll loosen the clay structure while creating channels for root expansion.
As organic matter decomposes, it feeds beneficial soil organisms that build stable aggregates. You’re simultaneously solving drainage problems, boosting fertility through slow-release nitrogen, and building a foundation where plants can thrive for years.
Recommended Products

Nutrient-Rich Organic Compost for Healthy Soil: Support stronger plant growth with this premium organic compost made from dairy cow manure. This all purpose soil amendment helps replenish essential nutrients often depleted after harvests, making it ideal for vegetable gardens, fruit trees, flowers, lawns and container plants.

Fine 1–3mm For Seed Starting: Fine vermiculite blends easily into seed starting mix and seed starting soil, helping maintain consistent moisture around seeds and delicate roots for germination, seedlings, propagation, and early plant growth

Feed the soil not the plants - stimulate microbial activity in your soil and boost probability of success with all types of plants… like composting but faster
Mulch Clay Soil to Stop Crusting and Save Moisture
Once you’ve loosened your clay soil with compost, you’ll need to protect that investment with a strategic mulch layer that stops surface crusting and locks in moisture through the growing season.
- Slow water absorption to reduce runoff, keeping your clay surface damp longer for superior moisture retention.
- Lower soil temperatures during hot weather, improving root comfort in dense clay conditions.
- Suppress weeds that compete against your plants for limited water and nutrients.
- Add decomposing organic matter, which gradually transforms your clay’s structure and infiltration capacity.
You’ll apply 2-3 inches of shredded bark, straw, or leaf mulch around permanent plants, maintaining this cover to stabilize moisture and prevent summer cracking. This mulching approach transforms challenging clay into workable, thriving garden soil.
Recommended Products

Quick, at home results for Soil pH, Nitrogen, Phosphrous and Potash

Comprehensive Soil Analysis: Liquid soil test kits offer a comprehensive analysis of essential soil parameters, including pH, ammonia, nitrogen, phosphorus, and potassium. Having all these measurements in one kit provides a holistic understanding of the soil's fertility and health.
ENSURE the most SUCCESSFUL food plot possible
Plant These Flowers, Shrubs, and Vegetables in Clay
You’ll find that selecting the right plants for your clay soil saves you years of frustration, since forcing unsuitable species into dense ground wastes effort and resources. Focus your choices on clay-tolerant flowering plants like phlox, daylilies, and black-eyed Susans, hardy shrubs such as viburnum, roses, and ninebark, and vegetables including brassicas, beans, and squash that handle wet winters and dry summers without succumbing to root rot. Match each selection to your specific USDA hardiness zone, ensuring adequate spacing, typically 18 to 36 inches for perennials and 4 to 6 feet for shrubs, and amend planting holes with compost rather than attempting to modify entire beds at once.
Recommended Products

PROFESSIONAL-GRADE ACCURACY: Engineered specifically for soil pH testing, delivering results quickly (in about 60 seconds). With a 3rd Generation, 3-pad ph tester strips design, our soil ph test kit ensures consistent, repeatable results for all your lawn, landscape and garden needs.

✅ 1Dial & 1 LCD Screen - Replace/install all 3 batteries each time. Put button to %RH/°F to - Turn On, and put to LIGHT to - Turn Off. Read the LCD results in 3-5 mins. (Not Water Moisture Meter, so, please don't test liquid)
Clay-Tolerant Flowering Plants
Where should you begin when heavy clay threatens to limit your garden’s color and variety? Start by selecting flowering plants that naturally adapt to dense, moisture-retentive conditions, while you amend your clay soil with organic matter to improve structure and drainage. You’ll find success with these proven performers:
- Plant Daylily (Hemerocallis ‘Stella de Oro’, USDA zones 3-9) and ornamental grasses such as feather reed grass for their deep roots and drought tolerance once established, spacing them 18-24 inches apart in full sun.
- Grow Petunia and Verbena as annual accents, providing consistent moisture through drip irrigation while ensuring drainage holes or raised beds prevent root rot.
- Establish Phlox (Phlox paniculata ‘David’) and Coneflower (Echinacea purpurea) in fertile, held-water conditions, mulching with 2-3 inches of shredded bark to moderate temperature extremes.
- Avoid early-season bulbs, instead selecting labeled clay-tolerant varieties for improved flowering success.
Hardy Shrubs for Clay
How can you anchor your clay garden with lasting structure and year-round presence? You’ll find your answer in hardy shrubs, the backbone of any clay-tolerant landscape.
Rose of Sharon, Viburnum, and Spirea stand out as exceptional choices, thriving in dense, moisture-retentive clays where other plants falter. Roses also perform remarkably well, capitalizing on clay’s nutrient retention and stable root contact. When you select flowering shrubs, prioritize varieties that withstand wet winters and drier summers, the seasonal rhythm of clay conditions. Look for robust root systems capable of penetrating compacted soil to access deeper moisture reserves. Pair these shrubs with perennials like Coneflower and Daylily for continuous bloom. Proper clay soil amendment around planting holes improves establishment, though mature hardy shrubs typically require minimal intervention once their roots exploit native moisture retention.
Vegetables That Thrive
Hardy shrubs give your clay garden its framework, but your vegetable patch demands a different strategy, one that works with clay’s stubborn nature rather than against it.
You’ll succeed by selecting crops tolerant of heavy soil and amending aggressively. Transform your planting beds with these proven techniques:
- Spread 3 inches of pea gravel and work it 8–10 inches deep to fracture compacted clay and establish drainage channels
- Till in 3 inches of decomposed granite to the same depth, ensuring thorough mixing to prevent renewed compaction
- Blend regular compost into every planting hole, as organic amendments feed microbes that rebuild soil structure
- Add expanded shale, such as Haydite, to increase porosity permanently
Continue incorporating organic amendments seasonally. Your amended clay will reward you with robust harvests.
Rebuild Soil Structure With Annual Compost Top-Ups
Transform your clay-heavy beds into thriving, workable soil by committing to an annual ritual of compost top-dressing, a practice that delivers cumulative benefits you’ll notice within a single growing season and profound structural change across three to five years.
You’ll loosen your clay soil, improve drainage, and reduce compaction around roots with regular annual top-ups of compost. This organic amendment acts as a slow-release fertilizer, supplying nitrogen and other nutrients as it slowly decomposes. Each planting season, you’ll add fresh compost to your beds, gradually building a more friable, tilth-like soil structure over years.
Your compost increases water retention while enhancing porosity, contributing to better root access to air and moisture. For best results, mix new compost with excavated soil during planting, and continue adding compost to small spots where you place plants, spreading improvement gradually across your entire bed.
Recommended Products

Convenient Inground Worm Composter: Bury this vermicomposting bin underground or in your garden bed. Fill it with organic waste like kitchen scraps, paper, and leaves. In 2-3 months, worms transform it into nitrogen-rich compost. Perfect for eco-conscious families!

Optimized for Raised Beds: True Organic Raised Bed Food is specially designed to support abundant growth of herbs, flowers, vegetables, and fruits in raised beds and large containers.

Ready to Use, Right from the Bag: No prep required. This raised bed garden soil is packed with organic compost and nutrients, ready to use for quick and easy planting