



Yellowing tomato foliage often stems from nutrient mobility patterns you haven’t considered, where nitrogen deficiency hits older leaves first while iron troubles spare the veins. You’ll need to match your specific symptoms to the correct fix, whether that’s adjusting your watering schedule to 1-2 inches weekly in USDA zones 5-8, testing soil pH to unlock magnesium for ‘Brandywine’ heirlooms, or scouting ‘Celebrity’ hybrids for early blight lesions. The diagnosis determines whether you’re looking at a simple fertility tweak or a contagious pathogen requiring immediate quarantine. Here’s how to read your plants like a pro, starting with the pattern that distinguishes root rot from spider mite damage.
Match Your Symptoms: 60-Second Yellow Leaf Diagnosis
Where exactly are your tomato leaves turning yellow, and what does that location tell you about the underlying cause? You’re looking at a diagnostic puzzle where placement matters enormously. When yellow leaves cluster at your plant’s base, you’re likely dealing with nitrogen or other macronutrient deficiencies, since mobile nutrients migrate downward first. However, when new growth at the top turns yellow while older foliage stays green, you’ve pinpointed an iron deficiency or similar micronutrient problem, as these immobile nutrients cannot relocate within plant tissues.
You’ll also need to rule out overwatering, which mimics nutrient deficiency symptoms through root damage and oxygen deprivation. Check your soil moisture before fertilizing, because soggy conditions demand drainage fixes rather than supplements. Finally, scan for pests, disease spots, or salt buildup in containers, then apply targeted solutions: adjust watering, flush accumulated salts, or fertilize based on your specific diagnosis.
Recommended Products
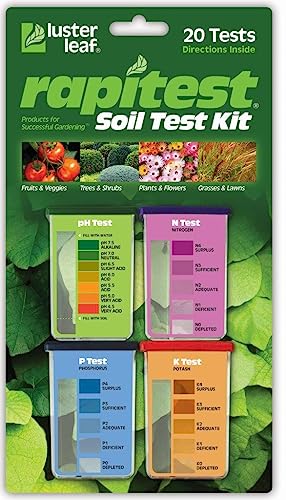
Quick, at home results for Soil pH, Nitrogen, Phosphorous and Potash Innovative and inexpensive soil test kit features an easy-to-use capsule system and patented color comparators

Kindly NOTE: This soil tester can not be applied to test pH value of any other liquid. If the soil is too dry the indicator will not move, and water it before testing.

KNOW BEFORE YOU GROW | Grow the healthiest, sustainable lawn and garden with the most accurate and easy to use professional soil test kit on the market
Water-Stressed Yellow Leaves: Too Much or Too Little?
You’ll need to examine your watering habits closely, since both overwatering and underwatering can trigger yellowing in tomato leaves, though each condition produces distinct symptoms you’ll learn to recognize. When you saturate the root zone repeatedly, you deprive roots of oxygen and leach away nitrogen, potassium, and magnesium, whereas insufficient moisture creates drought stress that halts nutrient transport entirely, leaving foliage pale and limp between waterings. To maintain the steady moisture tomatoes demand, especially as indeterminate varieties like ‘Brandywine’ or ‘Cherokee Purple’ approach fruiting in USDA zones 5 through 9, you should push your finger 2 to 3 inches into the soil near the root ball or install a soil moisture sensor, watering only when readings drop below 50% field capacity rather than adhering to a rigid calendar schedule.
Recommended Products
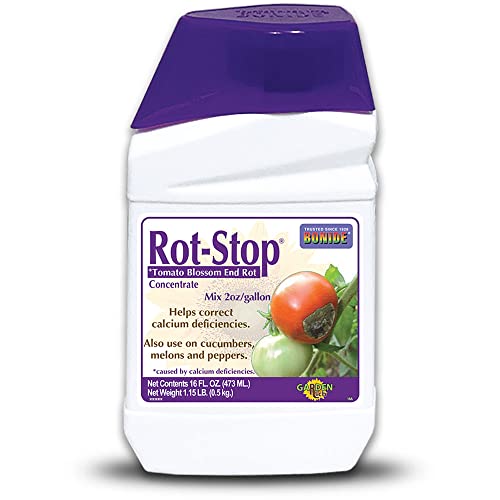
CORRECTS CALCIUM DEFICIENCY - Our garden fertilizer is used to control blossom end rot on tomatoes by adding calcium to the plant.

Contains natural ingredients to feed microbes in the soil

Package contains 4 pounds organic vegetable and tomato fertilizer grains and is produced to avoid wasteful runoff, mess, hazards and smells
Overwatering Risks
The challenge lies in distinguishing overwatering from underwatering, since both extremes produce superficially similar symptoms, yet the remedies diverge sharply. When you notice yellow leaves spreading from the base upward, you likely face overwatering, not drought stress. Saturated soil suffocates tomato roots, starving them of oxygen and triggering nutrient leaching that mimics deficiency symptoms.
You must prioritize drainage before planting. Amend heavy clay soils, common in USDA zones 6 through 8, with compost or coarse sand to improve percolation. Check soil moisture by inserting your finger two inches deep, or invest in a moisture meter for precision. Water deeply only when the top inch dries slightly. Apply two to three inches of straw mulch to stabilize moisture levels as fruit sets.
Underwatering Signs
Your tomato plants can suffer just as severely from too little water as from too much, and recognizing the difference demands close attention to timing, texture, and leaf position. When you spot yellowing leaves beginning at the tips and edges rather than the base, you’re likely witnessing underwatering, a condition where parched soil moisture blocks nutrient uptake and triggers drought defense. You’ll notice the top inch of soil becomes dusty and cracked, and leaves may feel brittle rather than limp.
Check soil moisture with your finger or a meter near the root zone, and you’ll discover that insufficient water creates watering stress distinct from rot: plants conserve resources, growth stalls, and foliage pales uniformly. As tomatoes mature, their water demands increase substantially, so you must monitor daily, adjusting frequency to prevent chronic dryness from compounding into persistent yellowing.
Proper Moisture Balance
Striking the right moisture balance means reading your plants and soil with precision, since both drought and saturation produce yellowing that can fool even experienced growers. You need to check soil moisture directly at the root zone, using a moisture meter or your finger, rather than guessing based on surface appearance. Water deeply but infrequently, allowing the top inch to dry slightly between waterings, which prevents nutrient leaching and encourages strong root development.
Apply mulch around your plants to stabilize root-zone moisture and reduce evaporation, especially as temperatures climb. When you fertilize, water thoroughly afterward to aid nutrient uptake. Watch for wilting or rapid soil drying as plants mature, since their water demands increase substantially. By monitoring conditions actively, you avoid drought stress and the yellowing that follows inconsistent care.
Yellow Leaves With Green Veins: Iron and Magnesium Fixes
When you notice your tomato leaves turning yellow while the veins stay stubbornly green, you’re likely facing either an iron or magnesium deficiency, and knowing which one you’re dealing with determines your entire treatment approach. Iron-starved plants display pale, yellow new growth with green veins, particularly when soil pH strays above 6.8 or root damage limits uptake, whereas magnesium deficiency attacks older leaves first, creating that same interveinal yellowing on foliage lower down the plant. You’ll need to test your soil pH, aiming for that sweet spot between 6.0 and 6.8, then apply chelated iron for new-growth issues or Epsom salt foliar sprays for magnesium problems, always checking that you’re not overcorrecting and creating new imbalances in your Zone-appropriate determinate or indeterminate cultivars.
Recommended Products
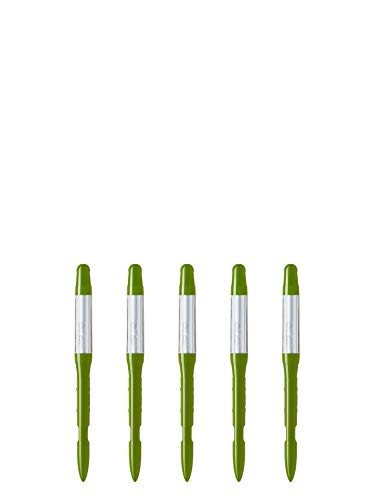
Dimensions: 0.4 x 0.3 x 4.7 inches (small) - Intended for pot sizes of 2, 2.5, and 3 - Ideal for small succulents
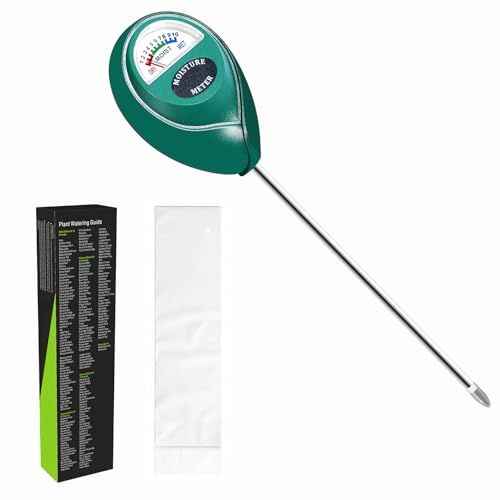
Trusted Since 2015: Become one of the many plant lovers who rely on the proven accuracy of XLUX. Established in 2015, our soil moisture meter has earned over 60,000+ verified ratings for its consistent performance. While many many newer brands come and go, we provide the long-term reliability and quality that American households have trusted for over a decade.

Iron Deficiency Signs
How can you tell if your tomato plants lack iron rather than another nutrient? You’ll notice iron deficiency striking your tomato leaves at the top first, with youngest growth turning pale yellow while veins stubbornly stay green. This pattern differs sharply from other nutrient problems, which typically attack older foliage.
Check your soil pH immediately, since nutrient uptake suffers dramatically when pH drifts above 6.8. Target that 6.0–6.8 range for optimal iron availability. Test your soil with a reliable meter, then adjust with elemental sulfur if readings run high. Avoid over-fertilizing with phosphorus, as excess locks up iron and worsens your plant’s condition. Maintain balanced nutrition through careful amendment. You’re looking for uniform yellowing on new growth specifically, not the speckled pattern that appears elsewhere. Act quickly when you spot these signs, correcting pH improves iron uptake within weeks.
Magnesium Deficiency Signs
Iron deficiency targets your youngest leaves first, but magnesium shortage behaves differently, and you’ll spot it by where the damage begins. With magnesium deficiency, you’ll notice interveinal yellowing on your lower leaves, since magnesium moves readily through the plant to support new growth while abandoning older tissue. The veins stay green, creating that distinctive marbled pattern you’re seeing.
Your soil pH adjustment plays a critical role here, as magnesium becomes unavailable when pH climbs above 7.0 or when excessive potassium and calcium compete for uptake. Test your soil, then work toward a 6.0–7.0 range for optimal availability. Apply Epsom salts or a magnesium fertilizer at package rates, maintain consistent moisture, and watch your lower leaves gradually restore their color as you correct the imbalance.
Pale All Over? Nitrogen and General Nutrient Solutions
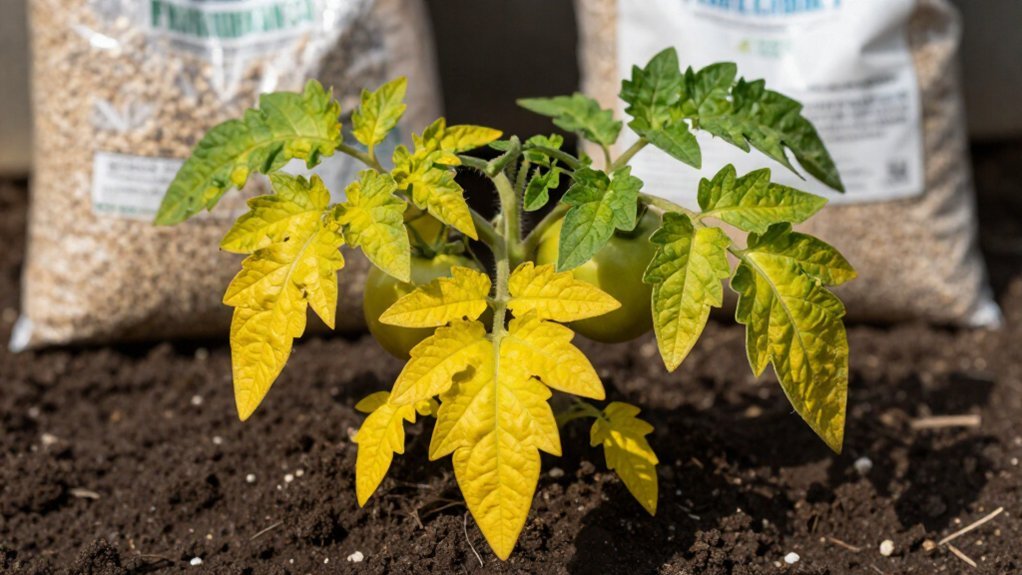
Why do your tomato leaves look more like pale parchment than healthy green? You’ve likely encountered nitrogen deficiency, the most common cause of yellowing leaves in tomato plants. Your plant prioritizes younger growth, so you’ll notice older basal leaves turning pale yellow first. Tomatoes are heavy feeders, requiring about twice as much fertilizer as cucumbers and four times that of beans, so insufficient fertilization practices often trigger this nutrient deficiency.
Check your containers or garden beds for exhausted soil, since poor fertility mimics deficiency symptoms and causes general yellowing with stunted growth. Apply a balanced, slow-release fertilizer or side-dress with composted manure, following package rates for your USDA zone. Don’t overcorrect, excess nitrogen produces lush foliage but few fruits and increases pest susceptibility. Monitor new growth for recovery within two weeks.
Recommended Products

CORRECTS CALCIUM DEFICIENCY - Our garden fertilizer is used to control blossom end rot on tomatoes by adding calcium to the plant.
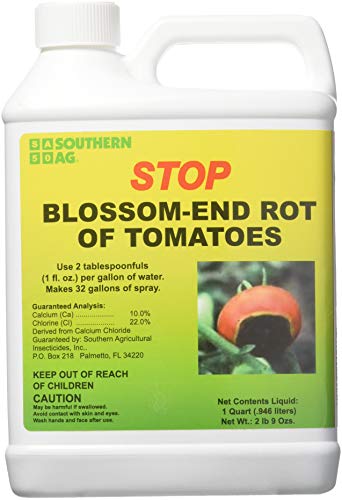
Prevents tomatoes rot due to Calcium deficiency

Corrects calcium deficiency
Yellow Leaves From Pests: Aphids, Mites, and Sap-Suckers
You’ll need to inspect your tomato plants closely to identify which sap-sucking pest you’re dealing with, since aphids leave yellow, misshapen, sticky leaves with ants trailing after their honeydew, while spider mites create finely dotted, brownish foliage with nearly invisible webs. Once you’ve spotted the culprits, you can apply diatomaceous earth to control aphids directly, though you’ll want to reapply it in well-ventilated areas after rain or watering when tackling mites, as moisture quickly reduces its effectiveness. By combining regular monitoring with early interventions like hand-picking, insecticidal soap, neem oil applications, and attracting beneficial insects, you’ll stop these pests before they weaken your plants, accelerate yellowing, or transmit incurable viral diseases throughout your garden.
Recommended Products

MAXIMIZE YIELDS – This outdoor and indoor plant fungicide kills and prevents common plant pathogens, including powdery mildew, alternaria blight root rot, crown rot, and stem rot. When unavailable, use Earth’s Ally Disease Control, which provides the same proven fungicide protection.

Fast-Acting Calcium: Provides a rapid calcium spray to plant tissues, ensuring stronger cell walls and healthy fruit development; Quick absorption formula helps stop blossom-end rot at the source for visibly better results
Identifying Common Sap-Sucking Pests
Sap-sucking pests frequently rank among the most common culprits when your tomato leaves begin yellowing, and learning to identify these tiny invaders early can save your harvest before significant damage occurs. Aphids cluster on undersides of leaves and stems, causing yellow, misshapen, and sticky foliage, often with ants attracted to honeydew they produce. Spider mites create brownish, finely dotted leaves with fine webbing between veins, becoming active in USDA zones 4-11 when conditions turn hot and dry. Whiteflies flutter up in clouds when you disturb your plants, while thrips leave silvery streaks and distorted growth after feeding.
These pests, including aphids, spider mites, whiteflies, and thrips, weaken plants and transmit viral diseases causing additional yellowing. You should inspect leaf undersides weekly, hand-remove visible pests promptly, and apply insecticidal soap or neem oil at first detection. Maintain 24-36 inch spacing between plants and ensure vigorous growth through consistent watering and balanced fertilization to reduce establishment opportunities.
Organic Control Methods
When aphids, spider mites, and other sap-sucking pests begin turning your tomato leaves yellow, you’ve got several proven organic methods at your disposal that don’t require synthetic chemicals. You can dust affected plants with diatomaceous earth, a powdery fossilized algae that abrades soft-bodied insects, though you’ll need to reapply after rain or watering, especially in well-ventilated areas where spider mites thrive. For larger pests like Colorado potato beetles, tomato hornworms, grasshoppers, and flea beetles, handpick them when spotted and deploy additional organic controls promptly. Since some pests vector viral diseases that cause yellowing, inspect plants weekly, remove afflicted specimens immediately, and sanitize your tools between uses. Encourage beneficial insects such as ladybugs by planting companion flowers, and dispose of damaged leaves properly to break pest cycles before they escalate.
Holes in Yellow Leaves: Chewing Insects and Control
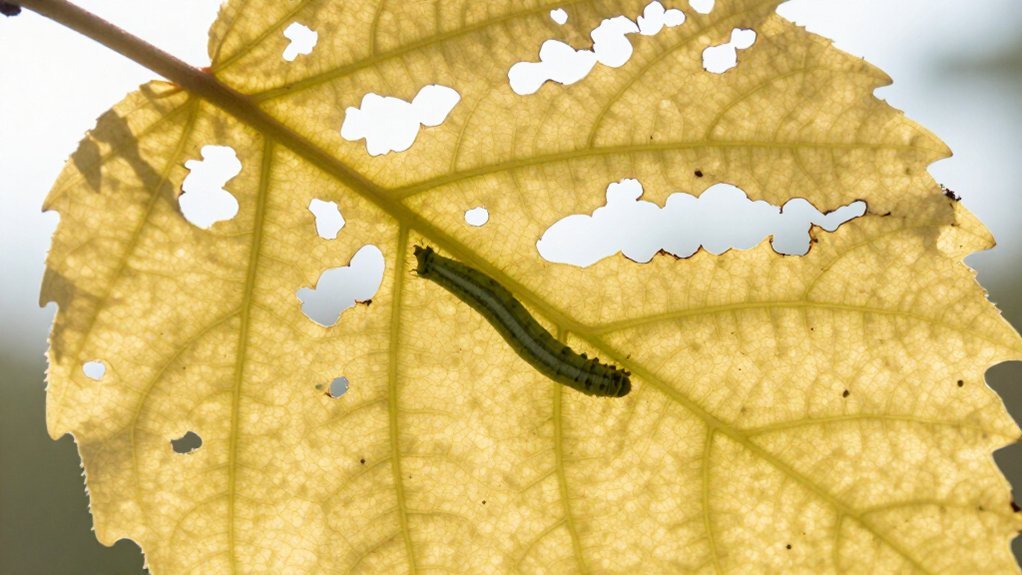
Yellow tomato leaves peppered with holes almost always signal chewing insects at work, and you’ll need to act quickly to protect your crop before the damage spreads to fruit or stems. Colorado potato beetles, tomato hornworms, grasshoppers, and flea beetles rank among the most common culprits behind this distinctive leaf yellowing and perforation pattern in zones 3 through 10.
For effective pest management, inspect your plants at dawn or dusk when insects feed most actively, checking leaf undersides and stems for eggs, larvae, or adult pests. Aphids and spider mites may accompany chewing damage; you’ll spot these by honeydew residue, fine webbing, or stippled foliage near affected areas.
Implement organic controls immediately upon detection. Hand-pick visible pests and damaged leaves, dropping them into soapy water, then apply diatomaceous earth around plant bases or spray insecticidal soap or neem oil at 7- to 10-day intervals. Sanitize your pruning shears with 70% isopropyl alcohol between cuts to prevent spreading pathogens. Maintain 24- to 36-inch spacing between ‘Roma’ or ‘Celebrity’ plants for airflow, and rotate your tomato beds annually to disrupt pest life cycles.
Recommended Products

Accurate Soil pH Testing: Dewildetradingco Soil pH Test Strips offer measurements of soil pH levels (pH 3.5-9). As an essential tool for every gardener and grower, these test strips help determine the optimal pH for various plants, such as outdoor plants, indoor plants, gardens, grass lawns, fruit trees, flowers, vegetables, and forest shrubs.

✅ 1Dial & 1 LCD Screen - Replace/install all 3 batteries each time. Put button to %RH/°F to - Turn On, and put to LIGHT to - Turn Off. Read the LCD results in 3-5 mins. (Not Water Moisture Meter, so, please don't test liquid)

【4 in 1 function】This is a 4-in-1 multifunctional soil tester.Our soil tester fastly to measure soil moisture, pH, temperature and sunlight to help you take better care of flowers and plants.You can know when you need to water your soil by measuring moisture and pH & Temperature value of the soil and sunlight level of plants with it.
Yellow Spots That Spread: Fungal Disease Identification
Unlike the ragged perforations left by chewing insects, yellow spots that spread across your tomato foliage point toward fungal pathogens, which demand a different diagnostic approach and management strategy entirely. You can identify Septoria leaf spot by its circular brown patches with light centers and dark specks, which start on older leaves and spread upward through your plant canopy. Early blight produces spots with dark concentric rings on leaves and stems, with humidity and warm days increasing severity dramatically. These fungal diseases thrive when moisture lingers on foliage, so you must examine your plants closely during humid mornings. You should remove infected leaves immediately, avoid overhead watering that splashes spores, and select resistant varieties like ‘Celebrity’ or ‘Better Boy’ when replanting in zones 3-10.
Recommended Products

Burpee Organic All Purpose Granular Plant Food is formulated for long-lasting results

Let our professionally formulated plant food help you grow bigger, juicer and plumper tomatoes in your garden

ORGANIC AND OMRI LISTED: Certified organic, 100% natural tomato fertilizer that meets the highest standards for organic farming; OMRI listed for guaranteed quality and environmental friendliness
Mosaic Patterns and Ring Spots: Viral Damage Signs
How can you distinguish viral infections from the fungal diseases you’ve already learned to spot? You’re looking for mosaic patterns rather than spreading spots, and you’ll notice your yellowing leaves appear dappled with twisted, distorted new growth rather than browning edges.
Tomato mosaic virus causes exactly this: irregular light and dark green patches that read as mottled yellowing, often accompanied by cupped or stringy foliage. Unlike fungi, you won’t find concentric ring spots on these leaves, though bacterial infections can mimic them with small dark lesions. Aphids transmit tomato mosaic virus as they feed, so controlling these pests becomes essential prevention.
You cannot cure infected plants, so remove and destroy them immediately, then wash your hands and tools thoroughly. Choose resistant varieties like ‘Celebrity’ or ‘Better Boy’ in Zones 3 through 10, maintain strict sanitation, and avoid working when foliage is wet to protect your remaining crop.
Recommended Products

Dimensions: 7.09 x 0.39 x 0.31 inches (medium) - Intended for pot sizes of 3.5, 4, 5, and 6
Dimensions: 7.09 x 0.39 x 0.31 inches (medium) - Intended for pot sizes of 3.5, 4, 5, and 6
Yellow and Wilting: Nematodes, Wilt Diseases, and Root Toxins
Why do your tomato leaves turn yellow and wilt starting from the bottom, even when you water faithfully? You’re likely facing soil-borne attackers, specifically fusarium wilt, verticillium wilt, or root-knot nematodes, which systematically destroy vascular tissues while your infected roots swell and knot. Bacterial wilt diseases strike suddenly during hot, humid periods, collapsing plants that appeared vigorous hours earlier.
You must also consider root toxins from neighboring black walnut trees, whose exudates poison tomato roots within 50 to 60 feet. Examine your roots immediately: nematodes create characteristic galls, while wilt pathogens show brown vascular streaking when you split stems lengthwise. You cannot cure established infections. Remove and destroy affected plants entirely, never composting them.
Plant resistant varieties like ‘Celebrity,’ ‘Better Boy,’ or ‘Roma VF’ (Zones 3-11), rotate solanaceous crops every three years, and introduce beneficial nematodes (apply 5 million Steinernema feltiae per 1,000 square feet) to suppress destructive species. Test soil for walnut toxicity before planting, maintaining 75-foot minimum separation where possible.
Recommended Products

🛠️ RESCUE ROOTS FROM ROT, SHOCK & OVERWATERING Brown, mushy roots? Yellowing leaves? Soggy soil that never seems to dry? These are classic signs of root rot, transplant shock, or overwatering stress. Our Root Rot Repair formula targets the underlying damage, helping your plant recover quickly and rebuild stronger roots from the ground up.

FOR USE ON: Use Tomato-tone organic fertilizer for all types of tomatoes; both heirloom and hybrid. It Produces plump, abundant tomatoes, not unwanted foliage. Can also be used on all vegetables.

Prevent Root Rot · Improve Soil Health: Scientifically designed gardening tools—air tubes enhance air circulation around plant roots, perfectly preventing root rot in bonsai, succulents, and plants caused by overwatering.
Roundup and Salt Damage: Chemical Causes of Yellowing
Not every yellowing pattern signals disease, and you will need to look closely at your growing environment before assuming infection has taken hold. Roundup exposure and salt buildup create chemical injury that mimics disease symptoms, yet requires entirely different management.
Yellowing leaves don’t always mean disease—chemical injury from Roundup or salt buildup mimics infection but needs different treatment.
- Roundup exposure causes bleaching that starts in new growth and spreads outward, with tomatoes showing particular sensitivity to drift from nearby applications.
- Salt buildup in containers, common in Zones 7-9, creates marginal yellowing leavesalas excess minerals accumulate in potting media.
- Chemical injury demands clean tools and thorough hand washing after handling affected foliage to prevent spread.
You’ll need to flush potted plants with water equal to twice the container volume. Remove damaged leaves, and avoid future Roundup applications within 50 feet of your vegetable garden.